Selecting Your eBook's Options
 Selecting Your eBook's Options
To select your eBook's options, click on the 'Options' button within the eBook Starter toolbar. You can also access the 'Options' by clicking 'Projects' - 'Options' within the toolbar.
![]() General
General
-
Enter your eBook Task Bar Title
This title will be displayed at the bottom of the screen within the task bar when your eBook is minimized. -
Enter your eBook Title Bar Title
This title will be displayed within the eBook's title bar, which is the blue title bar at the top of your eBook's window. -
eBook Icon
The icon that is displaying within this section will be used to access your eBook when it is completed. You can use your own icon by clicking on the 'Load Icon' button. Icons must be in ICO format and must be 32 x 32 pixels in size. If you need assistance, see the creating an icon section. -
Display Setting
-
Width / Height
This option enables you to select the window size for your eBook, should your users un-maximize it. However, this option will only be relevant if you enable your eBook to be resizable. It is highly recommended that you use the default size of 640x480, as this size will be viewable by a majority of your users. -
Resizable
Select this option if you would like to enable your users to resize your eBook to suit their needs. Highly recommended. -
Run Maximized
Select this option if you would like your eBook to open full screen (maximized).
-
-
Output
-
Default
This option will save your eBook to your project's folder. -
Specified Path
This option will enable you to specify where you would like your eBook to be saved.
-
-
Output Path
If you've selected the 'Specified Path' option, click on the folder within the 'Output Path' area to select the folder in which you'd like your eBook to be saved. If you've selected the 'Default' option, simply leave this area blank.
![]() Security
Security
-
No Security
This option will enable your eBook to be opened without a password or any additional security options. -
Key File
This option will ensure your eBook is only viewed on one computer. Although this security method is the most time-consuming, as you must process each individual customer's security information, it is the most secure.
 When using this security method, the complete eBook is encrypted with an automatically generated 'Secret Key.' This 'Secret Key' is stored within your project's folder and is needed to prepare keys for your readers. This file is very important, so make sure you keep it in a safe place.
The 'Secret Key' filename will be '<projectname>.key.prepare.' The <projectname> will be replaced by your ebook's filename. So, for example, if you create an eBook and your eBook's filename is test.exe, your 'Secret Key' filename will be 'test.key.prepare.'
 Once you compile your eBook, it's ready to send to your readers. When your reader opens your eBook, the eBook automatically looks for a key file with the same name as the eBook filename, except with a .key extension. When the key isn't found or the wrong key file is found, the eBook generates a file called, '<projectname>.key.query.' The <projectname> will be replaced by your eBook's filename.
So, for example, if your eBook's filename is test.exe, the filename will be 'test.key.query.' This file contains the reader's encrypted local computer information. This is the information that prevents your readers from sharing your eBook with their friends.
 In order for you to make a key for your reader, they will first need to send you the '<projectname>.key.query' file. It will reside within the same folder with the eBook.
Once you receive the '<projectname>.key.query' file, you will need to use it, along with the <projectname>.key.prepare file, to generate a key file.
Your first step will be to open the eBook Starter program and your eBook. In eBook Starter, go to 'Options' on the toolbar, and click on the 'Security' tab. You can run the 'Key Maker' by clicking on the 'Run Key Maker' link at the bottom. The key maker will generate a key file that looks like this: '<projectname>.key.' It will be found within your project's folder.
Your final step will be to send the key file to your reader. When your reader receives the key, they simply place it within the same directory where the eBook resides. They will then be able to open the eBook. -
Password
This option will enable you to protect your eBook with a single password.
This security method works by encrypting the eBook content with a password. When the eBook is opened, the password prompt appears. The user enters the password and the eBook decrypts its contents and displays.
This is a simple way to protect your eBooks. If the user doesn't know the password, the eBook will not open. -
Individual Usernames and Passwords
This security option is identical to the 'Password' option. However, this option works with one or more 'username-password' pairs.
This option will enable you to create a universal username and password for all of your customers, or create a unique username and password for each of your customers. -
Password Protect Type
-
All Book (Simple)
Protect your complete eBook with a password. When the user tries to open your ebook, they will be asked to enter a password.
This is the fastest and easiest way to password protect your eBook. The same password will be provided to all your readers. Select this option if you don't want to spend a lot of time creating custom passwords for each user. -
All Book (Shareware)
This option will enable you to create a shareware version of your eBook. A shareware version will enable you to allow your users to view your eBook a certain number of days or starts (opens). Once the allotted time has passed, the reader will be required to enter a password to continue reading your eBook.
You can find a customizable 'Shareware' page within the 'System Pages' section. This page will be displayed within the 'Shareware' informational window when your eBook is opened. It should be used to provide your readers with brief instructions for purchasing the full version. Go to 'Project' - 'System Pages' to customize your page. -
Selected Pages
Select this option if you would like to password protect certain pages, while enabling your users to view other pages.
To select the pages you'd like to password protect, your first step will be to select the 'Password' option within the 'Security' tab of the 'Options' window and type in a password. Next, select the 'Selected Pages' option and click on 'OK.'
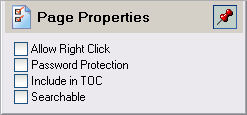
To select the files you would like to password protect, click on the 'Project' tab within the editor to view your files. Next, click on the file you would like to password protect, right click and go to 'Password Protection.' You can also click on the file you would like to password protect and then place a check beside the 'Password Protection' option within the 'Page Properties' section at the bottom of the 'Project' window.
You can find a customizable 'Password' page within the 'System Pages' section. This page will be displayed should your reader try to enter a password protected page. This page should be used to provide your readers with instructions for purchasing a password and/or entering their password. Go to 'Project' - 'System Pages' to customize your page.
-
-
Allow Right Click
-
Allow (Select this option to enable your users to use their right click mouse menu. This option would enable them to highlight your text and copy it.)
-
Don't Allow (Select this option to prevent your users from using their right click mouse menu. This option would prevent them from highlighting your text and copying it.)
-
Custom (Select this option to specify the right mouse click option for each individual file within your 'Project' window.
To set your preferences for each file, select this option and then open your 'Project' window.
Click on each ' Page' to highlight and place a check by the 'Allow Right Click' option within the 'Page Properties' section.
-
-
Run Key Maker (Use this button to create ebook keys for your customers. See 'Key File' in the Security section above for further information.)
![]() Toolbar
Toolbar
-
Button Size
The toolbar button size determines the size of your toolbar buttons displayed within your ebook. Edit the button's height and width to suit your needs. The button sizes are displayed in pixels. -
Image Size
The toolbar image size determines the size of the image displayed on your ebook's toolbar buttons. Edit the button image's height and width to suit your needs. The image sizes are displayed in pixels. -
Misc. Options
-
Show Caption
Check this option if you'd like to show the caption (text) with the toolbar buttons. -
Flat
Check this option if you'd like to display the toolbar buttons flat instead of three dimensional.
-
-
Logo
You have the option to display a custom logo within your eBooks that may be linked to the web site of your choice. Custom logos should not be larger than your button height and must be in BMP format. The default logo is an affiliate link to the eBook Starter site. -
Toolbar Placement
-
Top
Select this option if you would like to display your eBook's toolbar at the top. -
Bottom
Select this option if you would like to display your eBook's toolbar at the bottom. -
None
Select this option if you would prefer not to display a toolbar within your eBook.
-
-
Colors
Select your preferred colors for your toolbar background and font face. However, if you will be displaying button captions (text), make sure your text is clearly visible through your selected background color.
![]() Splash
Splash
-
Starting / Ending
Select your preferences for displaying a 'Starting' and/or 'Ending' splash and/or pop-up window. -
Pop-up / Splash Screen
-
None
Select this option if you don't want to display any 'Starting' or 'Ending' messages. -
Pop-up Message
Select this option if you'd like to display an 'Alert' type pop-up message. You can use this option to tell your readers about your eBook, the requirements to view your eBook, or whatever you'd like. -
Splash Screen
Select this option if you'd like to display a custom splash screen. Splash images can be the size of your choice; however, the image must be in BMP format. Click on the 'picture' icon to load your image. If you need to delete an image, click on the 'Red X.' You can see how your splash screen will look by clicking on the 'Preview' button.
Although you can define the number of seconds your image will display, it is highly recommended that you not display the splash screen for any longer than 4 seconds, as this may irritate your readers. In addition, it is also highly recommended that you enable your readers to close your splash screen on click.
-
-
Pop-up Text
If you've elected to display a 'Starting' and/or 'Ending' pop-up alert window, type your alert text within the text area. You can preview your pop-up by clicking on the 'Preview' button. -
Close after ? seconds
Select the number of seconds the splash screen should display before closing. It is highly recommended that you not display the splash screen for any longer than 4 seconds, as this may irritate your readers. -
Close on click
Check this option to close the splash screen when clicked on. It is highly recommended that you enable your readers to close your splash screen on click.